OutRun Mini Restoration |
Post Reply 
|
Page 123 7> |
| Author | |
dj_yt 
Bonus Stage 
Joined: 24 February 2010 Location: Surrey, UK. Status: Offline Points: 439 |
 Post Options Post Options
") Thanks(1) Thanks(1)
 Quote Reply Quote Reply
 Topic: OutRun Mini Restoration Topic: OutRun Mini RestorationPosted: 27 December 2014 at 9:41pm |
|
I figured it was time to start logging my OutRun Mini Restoration.
The back story: I bought this cabinet through a contact on a newsgroup back in 1997 (when I was just 17!) It cost me £200. The cabinet was in use at a youth club, so I got it direct from a long service. Here's a picture I took in 1997 when the cabinet arrived: 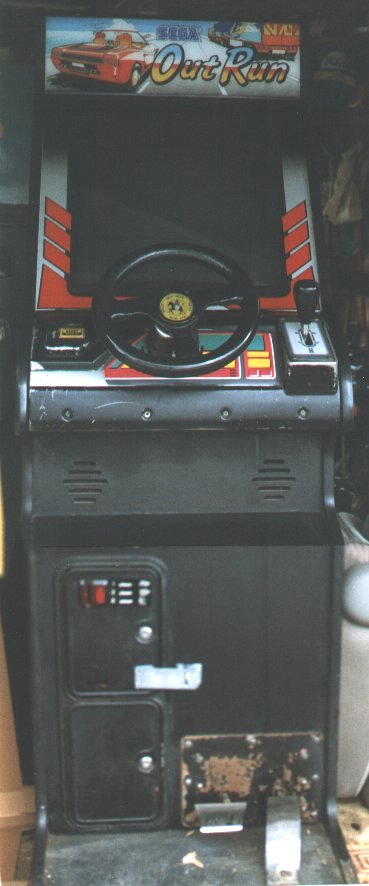 A few photos of the machine today: 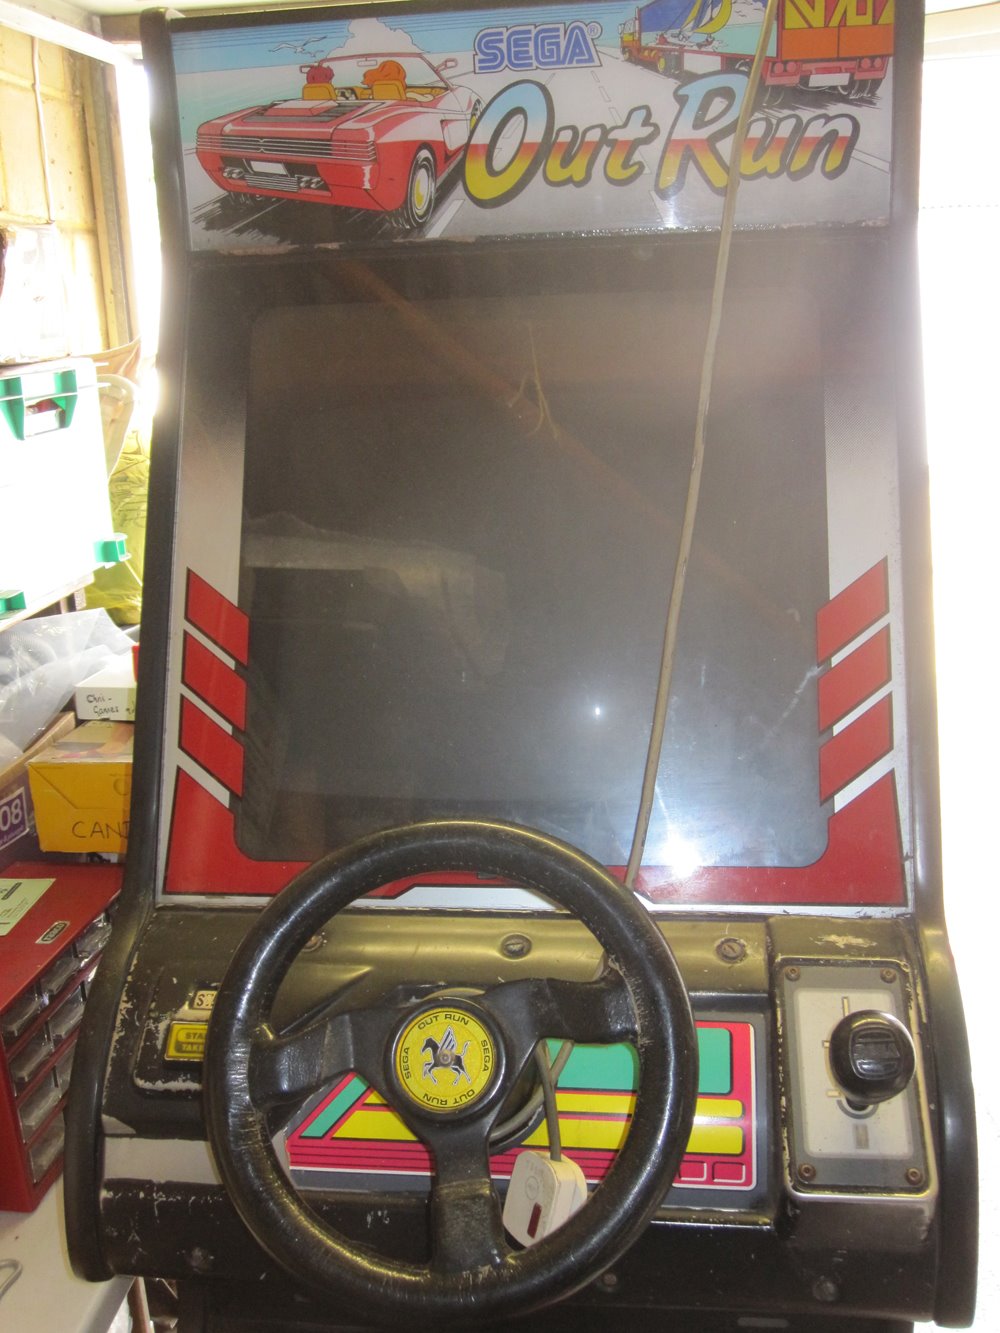 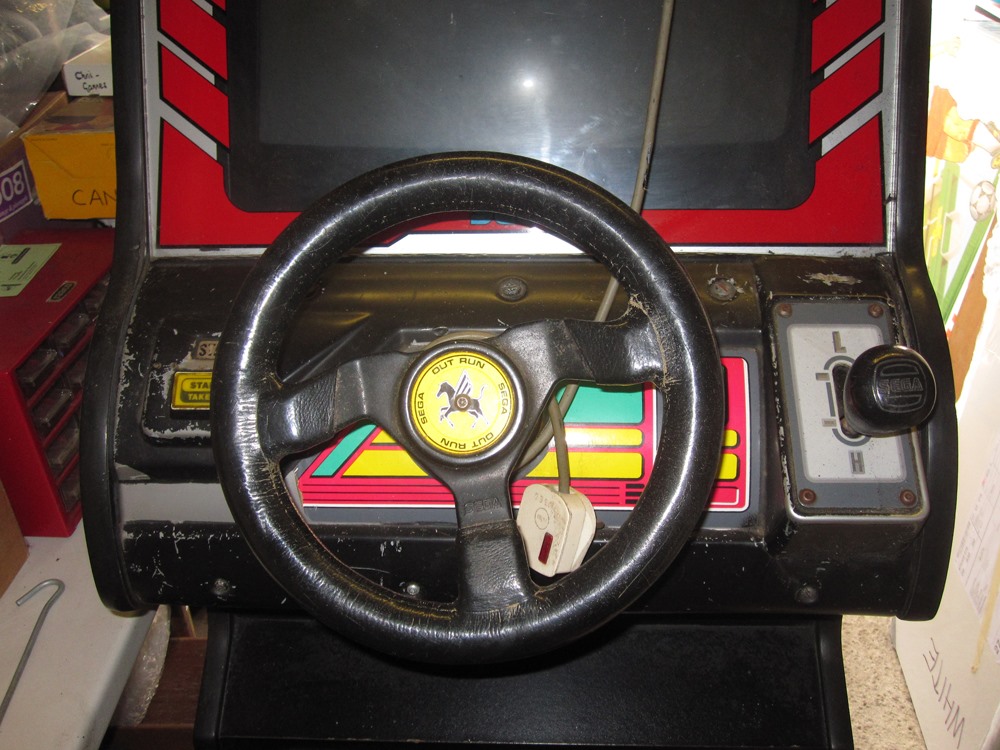  The game worked fine in 1997 and I played it for a year or so. I visited one of Sega's spare distributors (Deith Leisure I think) and bought a few parts... back when they still had a few OutRun spares knocking about! I then went to University, graduated, moved and didn't have space for OutRun. Until now... I have to thank my Dad for now only storing the machine for all that time, but for also helping me move it as he owns the larger car. He was obviously pleased to get rid of it! 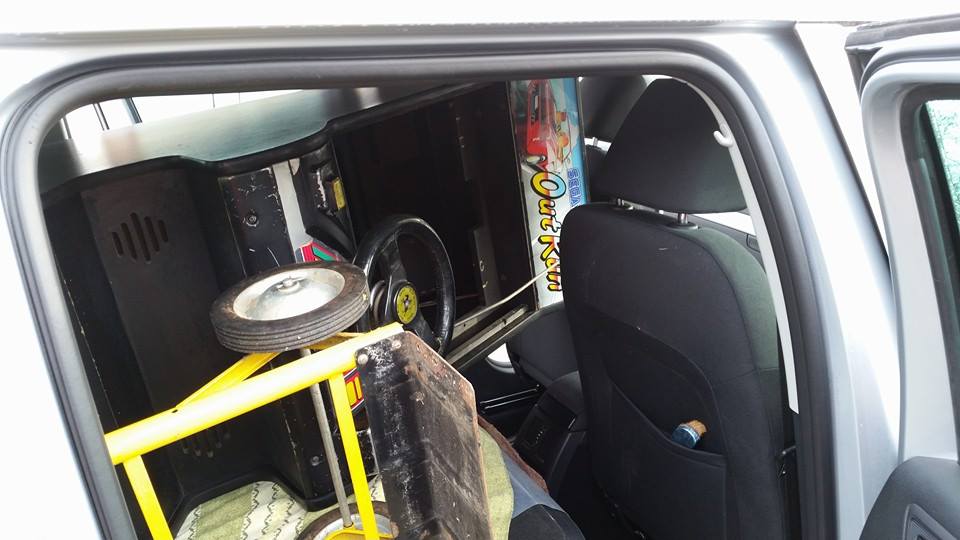 As you can see, some lunatic spray painted most of the cabinet black including the Control Panel. Unfortunately they'd covered the original Mini red side art. I've no idea why this was done, as the cabinet isn't in that bad condition. It's scruffy, but not awful. By 2014, this spray paint, which was done directly over the vinyl is flaking off and looks awful. The spray paint is scrapped off before moving the cabinet as it's a messy job.  Looks pretty dreadful whilst being done. The red art had bonded to the spray paint, so restoring it wouldn't have been feasible. The end result is pretty good though, leaving a smooth surface with the exception of some pre-existing blemishes and dents to the cabinet. The below image looks a lot worse than it is, but clearly this is a work in progress!  Anyway... at this point (about 6 weeks ago) the cabinet is now in my spare room. Edited by dj_yt - 29 March 2015 at 8:48pm |
|
 |
|
|
dj_yt
Bonus Stage
Joined: 24 February 2010 Location: Surrey, UK. Status: Offline Points: 439 |
Post Options
Thanks(0)
Quote Reply
Posted: 27 December 2014 at 9:48pm |
|
So at this point it's time to start stripping the cabinet down. The cabinet is absolutely filthy. Thick black dust coats pretty much everything. I don't think it's ever been cleaned in 30 odd years.
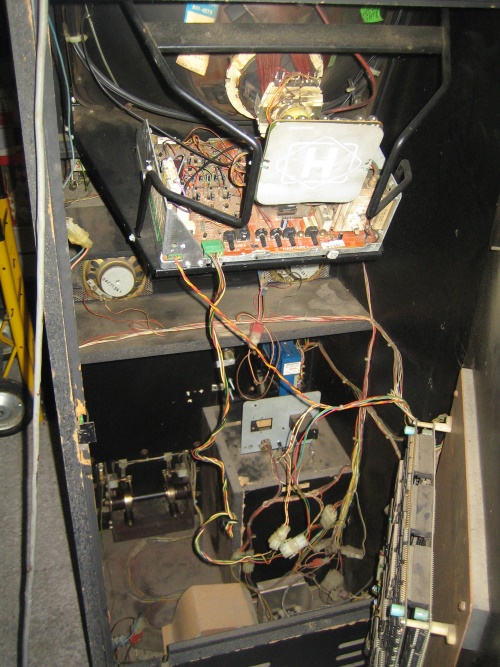 Inside there's better news. Everything looks pretty much complete and there's no rewiring or any funny business. It's pretty much as it was when it came out of the factory I think. Unbelievably, despite 16 years storage in a cold garage, the PCB powers up and works fine with my test harness (i.e. not using the original PSU). 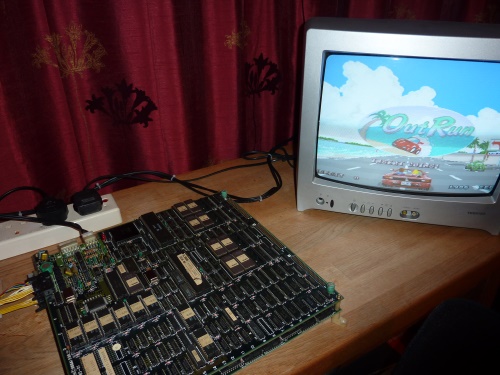 I really wasn't expecting that. The PCB itself seems to have fared really well and visually looks better than the spare PCB I'd purchased - (in anticipation of the original not working!)
|
|
|
|
|
dj_yt
Bonus Stage
Joined: 24 February 2010 Location: Surrey, UK. Status: Offline Points: 439 |
Post Options
Thanks(0)
Quote Reply
Posted: 27 December 2014 at 10:11pm |
|
I naively thought that it would then take me a couple of evenings to strip the cabinet down. I had developed a pretty thorough system of bagging and photographing the evidence as I went, a little like I was running some kind of drugs bust on wires and bolts.
Ha! What a fool I was. I hadn't accounted for the fact that many of the bolts would be seized and horrendously difficult to remove. The accelerator pedal bolts were so rusty, you couldn't really see them 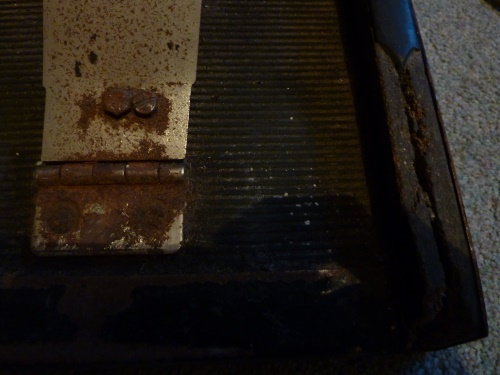 No amount of WD-40 or other trickery was going to remove these bolts. Not that I didn't try every trick I could think of. Drilling them was the only option. 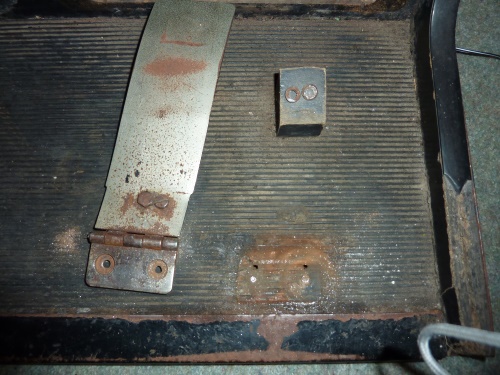 I hit a similar problem with the base-board. Now the base-board bolts into the bottom of the cabinet via some captive nuts (highlighted in pink below). Unfortunately these nuts had been damaged and were no longer secured in the bottom of the cabinet. I decided to turn the cabinet on its side and hold the captive nuts in place whilst turning the bolts.  It also turned out that the bolt thread was trashed, where these bolts had poked through the bottom and caught on the floor. This cabinet really wasn't put together very well in the first place. I could have taken the cabinet outside to angle grind the nuts off. But being winter, this wasn't a practical option. So I spent an hour hacksawing off both bolts.  Yes, I had to remove the hacksaw blade due to the tightness to the cabinet and slowly cut these off.
Edited by dj_yt - 27 December 2014 at 10:12pm |
|
|
|
|
dj_yt
Bonus Stage
Joined: 24 February 2010 Location: Surrey, UK. Status: Offline Points: 439 |
Post Options
Thanks(1)
Quote Reply
Posted: 27 December 2014 at 10:17pm |
|
Finally the cabinet is stripped of electronics and I can go wild with a cloth, some soapy water and a splash of bleach.
I can actually touch the cabinet without a layer of black gunk coming off on my hand! 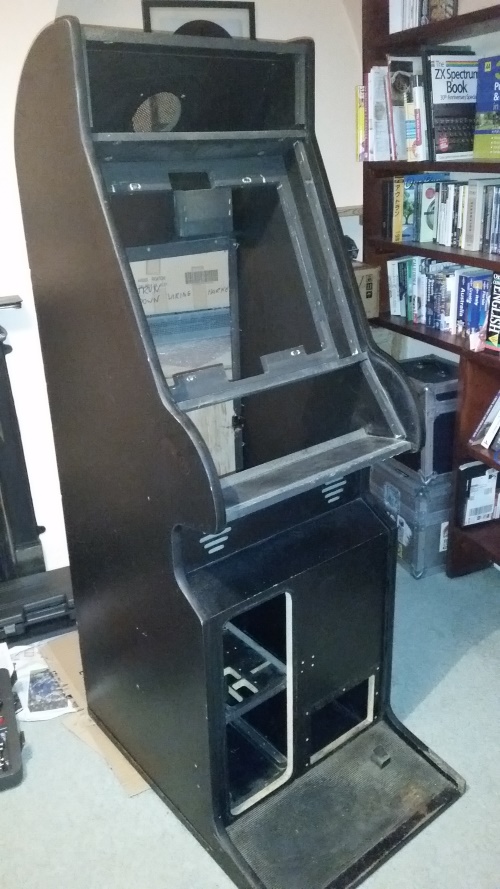 I spend some time stroking the cabinet in an unhealthy manner. The bottom metal plates are still on. But they will soon be removed, along with the rubber matting.
|
|
|
|
|
dj_yt
Bonus Stage
Joined: 24 February 2010 Location: Surrey, UK. Status: Offline Points: 439 |
Post Options
Thanks(1)
Quote Reply
Posted: 27 December 2014 at 10:26pm |
|
Back to the base-board. It fell out of the cabinet in an unholy ceremony of dust.
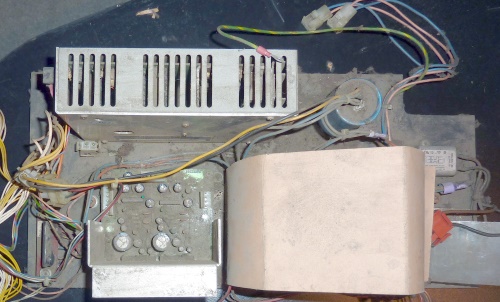 It was actually worse in the flesh than it looks here. (I guess I should say that I'm not trying to produce a 'mint' cabinet with this restoration or needlessly throw out good parts. Not that there's anything wrong with that approach. But I want to work with what I've got and make it as good as possible.) I removed the main components from the board, dismantled the PSU and scrubbed for a long time with anti-static bruhses, toothbrushes, baby wipes and so forth. 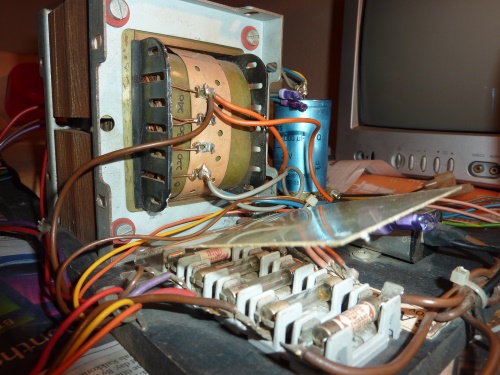 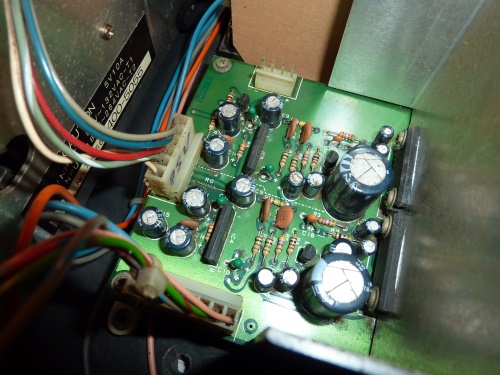 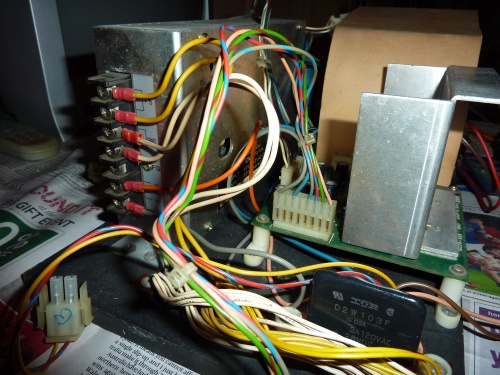 It's the moment of truth. I power up the base-board in isolation and reach for the multimeter. I read 5.3V at the end of the wiring harness that will connect to the PCB. Wahay, it works! Is this a little too high? Should I turn it down? Anything else I should measure? Please let me know. I'll continue to update as I make progress. It will be slow and steady progress though due to other commitments. Obviously I would be delighted to hear your thoughts, advice and offers of spare parts! :-) |
|
|
|
|
neil1637
Bonus Stage

Joined: 28 April 2014 Location: Carlisle Status: Offline Points: 496 |
Post Options
Thanks(0)
Quote Reply
Posted: 28 December 2014 at 10:24am |
|
Hi there,
Firstly I just wanted to post to let you know that there are people out here that are reading this thread. Not just reading it but avidly waiting for the next update to go on.
As a noob, I love these threads, espically the ones that go into detail and have plenty of photos to show your work. My skills are in restoration, but I am completely scared of electronics, based on having never touched them before, so I really do find these threads very helpful.
And secondly it's Outrun, so what's not to love!!!
Things are looking good, with some definite progress made already. Amazing what a difference a baby wipe can make !!
Keep up the great work.
Neil.
|
|
|
With education given, the treasure hunt begins. New cab list created - just need to find them. (Before you!)
|
|
|
|
|
cmonkey
High Score 
Joined: 15 October 2012 Location: Leeds, UK Status: Offline Points: 800 |
Post Options
Thanks(0)
Quote Reply
Posted: 28 December 2014 at 10:41am |
|
You'll be fine with 5.3v at the end of the wiring harness. OR is a very power hungry boardset and you'll find that the 5.3v will struggle to be much more than 5v at the chips. The switcher on my OR Mini puts out about 5.45v at the end of the harness, which equates to 5.07v at the chips on the board.
|
|
|
|
|
dj_yt
Bonus Stage
Joined: 24 February 2010 Location: Surrey, UK. Status: Offline Points: 439 |
Post Options
Thanks(1)
Quote Reply
Posted: 29 December 2014 at 9:04am |
|
Thanks Adrian.
Next steps will be removing the metal protectors from the base of the cabinet. I've been putting it off, as I doubt those screws/bolts are coming out without a fight. :-) On the electronics side, I'll run the board from the original PSU and try the audio too via the speakers - but send the video to my scart TV. I forgot to mention that the monitor was temperamental back when I last ran it in the 90s. The picture would change size as it warmed up. I suspect it's a capacitor issue and have bought a MTC 9000 Cap-Kit in preparation to get it working again.
|
|
|
|
|
dj_yt
Bonus Stage
Joined: 24 February 2010 Location: Surrey, UK. Status: Offline Points: 439 |
Post Options
Thanks(1)
Quote Reply
Posted: 30 December 2014 at 11:04pm |
|
Tackling removal of the protective plates at the bottom of the machine. As expected the screws are completely seized. I've now perfected the art of removing them though. My preferred technique is:
1/ WD-40 Specialist Penetrant 2/ Wait 3/ Wire brush the Screws/Bolts 4/ Attempt to turn with Vice Grip Pliers 5/ Repeat as many times as necessary. Up to 5 or so iterations. Anyway, after hours of this the front plate comes away - revealing treasure!  I'd already found 2 x 20ps doing this restoration. Now I add to the collection a 2p, a new 5p and the old 5p which went out of circulation in 1990 ;) A serious amount of crap falls out when this plate is removed. 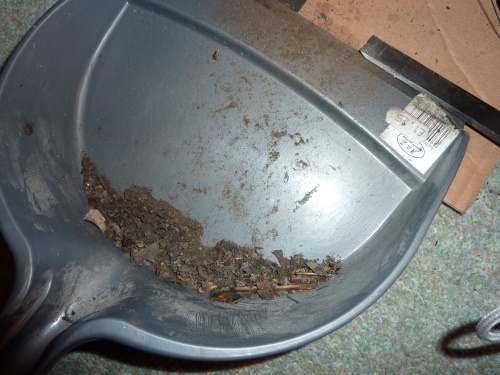 The first side plate is also removed. Interestingly this reveals the original artwork hidden under the plate.  Now, if you remember I had a huge amount of difficulty removing the bolts that held the accelerator pedal in place. In the above picture you can see the bottom of the slanted piece of wood that these screwed into. The interesting thing is, the accelerator was not bolted into the captive nuts at all. In fact nothing is. They were screwed directly into the wood slightly below. Can someone send me the measurement of the accelerator bolts from their mini? I want to find out whether the placement of the captive nuts - or the actual placement is the correct one. Adrian, I'm probably looking at you here! :-) ...these cabinets aren't very well made are they! 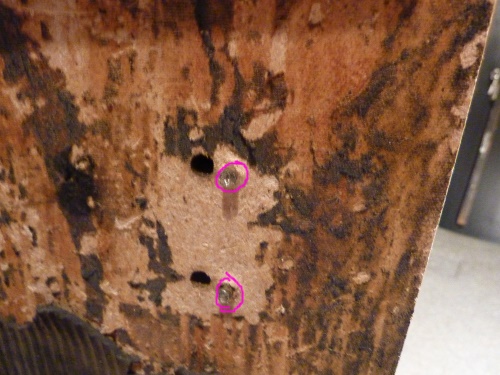 I'm currently scraping off the rubber matting as the mess above shows. Second question - does anyone know how the slanted wooden panel is attached to the rest of the cabinet? I can't see any obvious nails or screws and it would be handy to detach it completely. |
|
|
|
|
cmonkey
High Score
Joined: 15 October 2012 Location: Leeds, UK Status: Offline Points: 800 |
Post Options
Thanks(0)
Quote Reply
Posted: 30 December 2014 at 11:23pm |
|
At the rate you keep finding cash in this cab it'll have paid for itself in no time at all Chris!
 The screws that hold the accelerator pedal to the slanted wooden panel are M5 x 20 tamper proof screws. If you've got the OR Mini owners manual the details for these are on page 22. Sega part no. 008-0520 (item number 208 on p.22). If you don't have the manual then it can be found here :- More specifically, the screws you're looking for are these :- http://www.arcadefixit.com/product.sc?productId=244&categoryId=41 Looks like you're slowly making progress on the restoration, must make a refreshing change from ripping Sega's buggy code apart!
 |
|
|
|
|
dj_yt
Bonus Stage
Joined: 24 February 2010 Location: Surrey, UK. Status: Offline Points: 439 |
Post Options
Thanks(0)
Quote Reply
Posted: 30 December 2014 at 11:59pm |
|
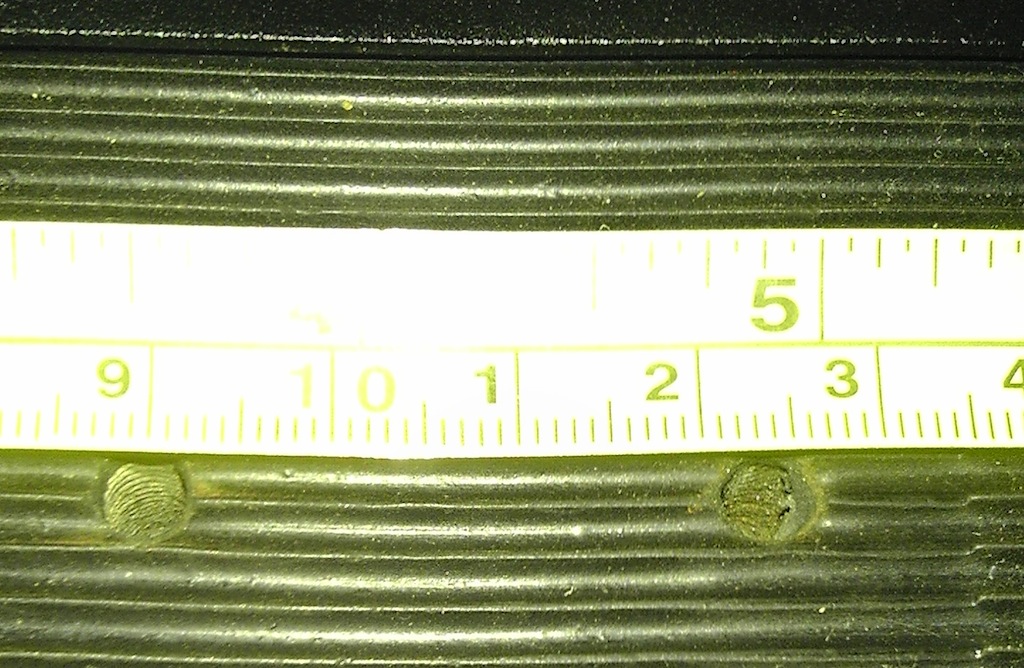
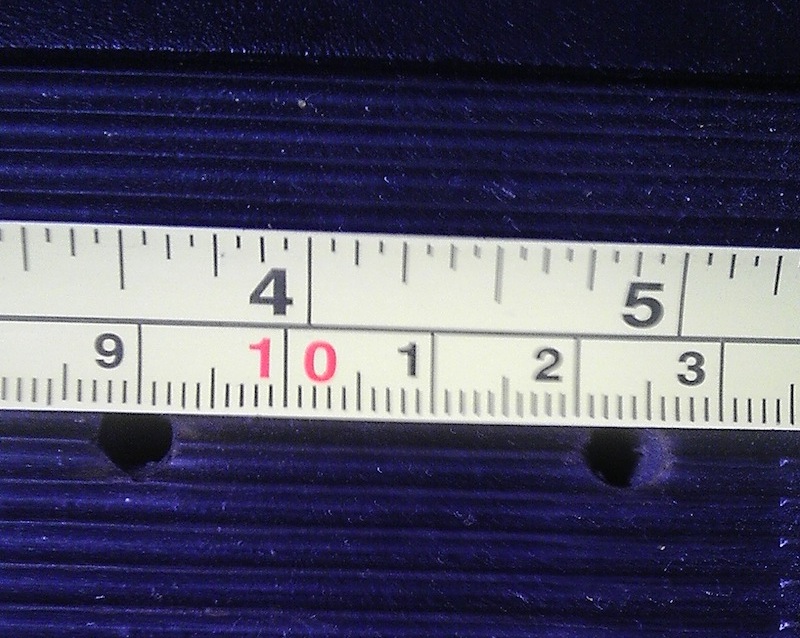
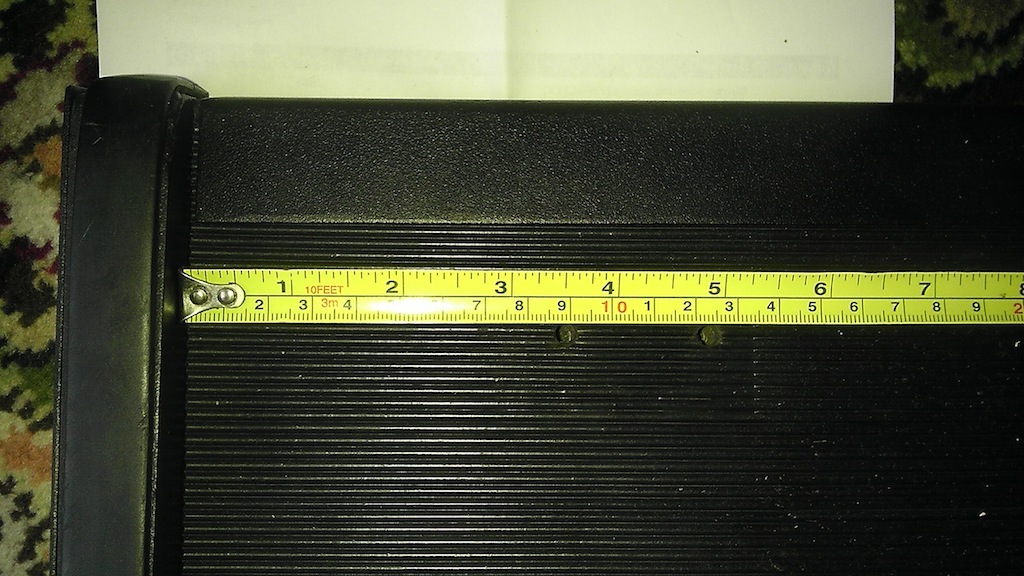
What I'm looking for is the actual positioning of the screws on your cabinet, rather than what type of screw they are. So x,y centimetres from the bottom right of the bit of wood they screw into if you will!
As they appear to have been mounted twice in my cabinet, it's not clear what the correct position is :) |
|
|
|
|
cmonkey
High Score
Joined: 15 October 2012 Location: Leeds, UK Status: Offline Points: 800 |
Post Options
Thanks(0)
Quote Reply
Posted: 31 December 2014 at 12:09am |
|
I'll do you some measurements and pics in the morning.
|
|
|
|
|
ben76
Kill Screen 

Official Porchy fan club member Joined: 21 June 2011 Location: Macc, Cheshire Status: Offline Points: 20710 |
Post Options
Thanks(0)
Quote Reply
Posted: 31 December 2014 at 12:36am |
|
Missed this! Outrun is ace and deserves the work you're doing imo keep up with it
 I'm ready with the mj popcorn gif if it goes quiet  - Ben |
|
|
I
 Porchy Porchy 
|
|
|
|
|
Beaps
Kill Screen

Tha Xbox Man Joined: 05 August 2010 Location: Essex Status: Offline Points: 6853 |
Post Options
Thanks(0)
Quote Reply
Posted: 31 December 2014 at 9:59am |
|
How did I miss this, wow you owned it all that time and just getting around to a resto
 Great work so far I will be watching the thread closly, thanks for sharing |
|
|
You need a CoinOps 7 Xbox Console or Uber Wii Console , ready to go, drop me a PM.
(.Y.) |
|
|
|
|
cmonkey
High Score
Joined: 15 October 2012 Location: Leeds, UK Status: Offline Points: 800 |
Post Options
Thanks(0)
Quote Reply
Posted: 31 December 2014 at 12:38pm |
|
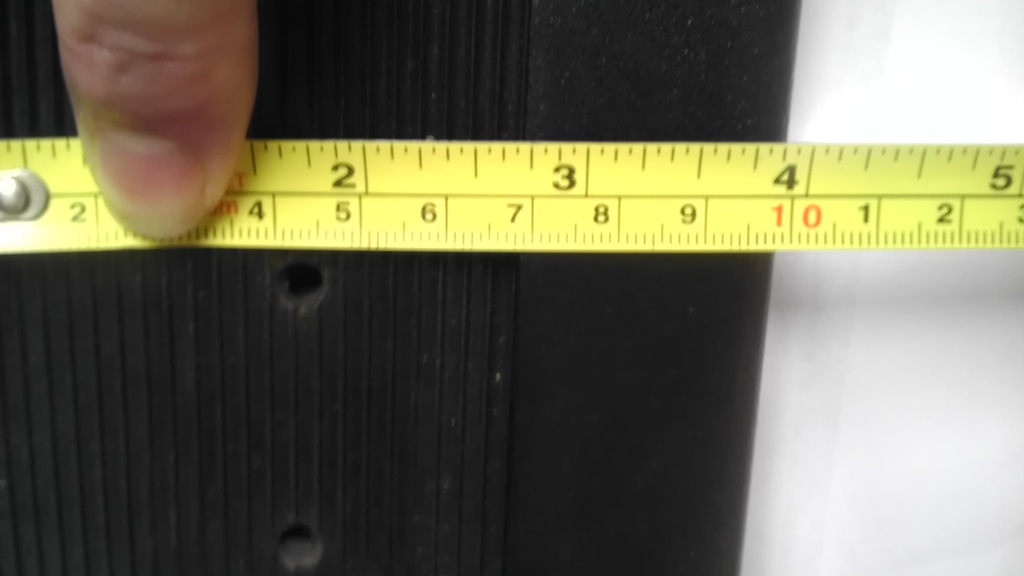
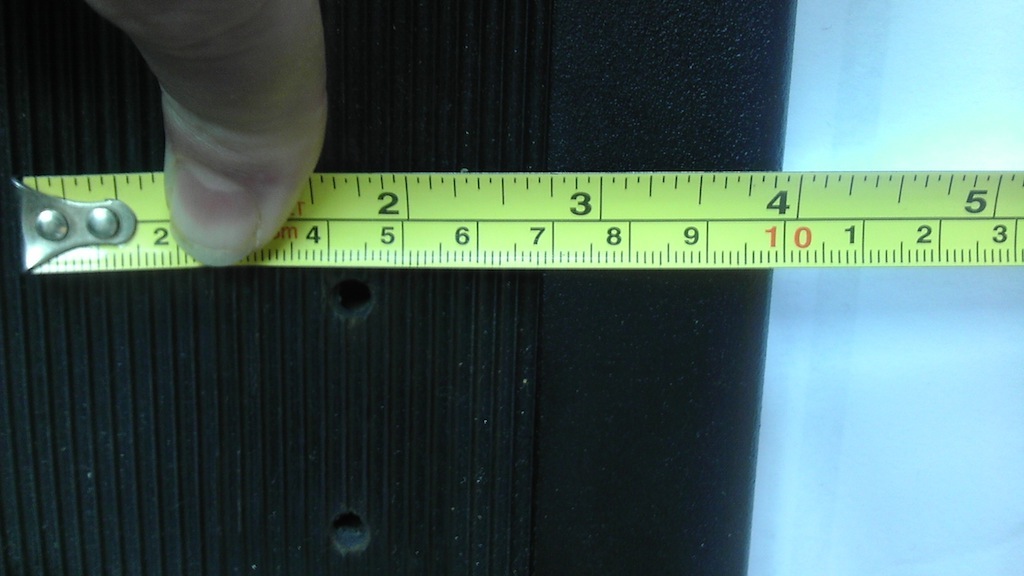
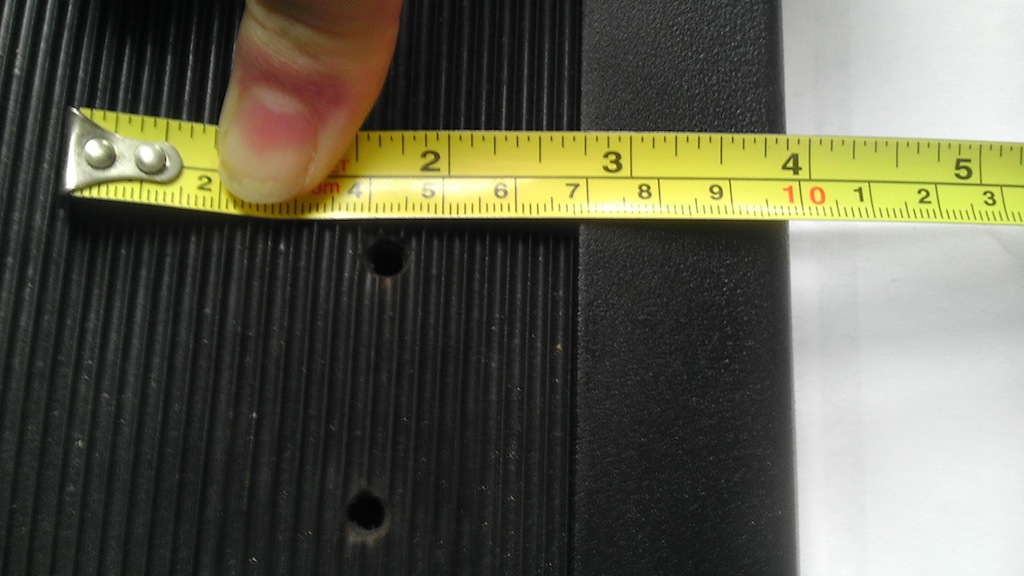
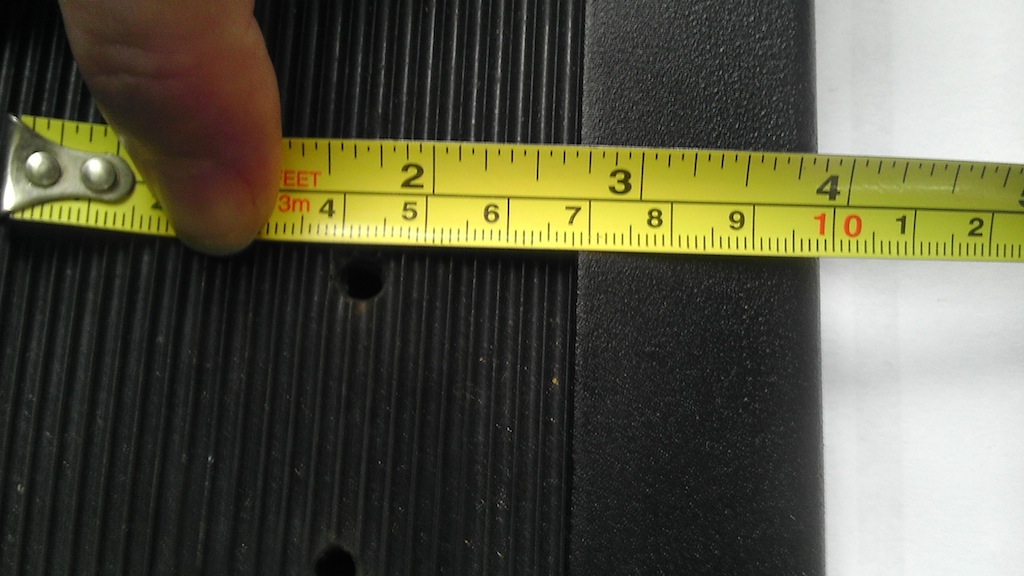
Hope these help!
       |
|
|
|
|
dj_yt
Bonus Stage
Joined: 24 February 2010 Location: Surrey, UK. Status: Offline Points: 439 |
Post Options
Thanks(0)
Quote Reply
Posted: 01 January 2015 at 9:49am |
|
Perfect thanks!
|
|
|
|
|
monkeychunkuk
Level Up 

Joined: 01 December 2014 Location: Worthing Status: Offline Points: 170 |
Post Options
Thanks(0)
Quote Reply
Posted: 07 January 2015 at 10:55pm |
|
Awesome post! cant wait to see it come along,what a proper dad !
|
|
|
Listen to my Podcast HERE
http://tinyurl.com/pqcy3w3 |
|
|
|
|
mrmul8r
Bonus Stage
Joined: 27 November 2013 Location: London Status: Offline Points: 328 |
Post Options
Thanks(0)
Quote Reply
Posted: 10 January 2015 at 6:21pm |
|
Went up in the loft today and found you a gas pedal, pedal arm (with hole) and retaining pin!
  |
|
|
|
|
Theory
High Score

Joined: 14 January 2011 Location: Newcastle Status: Offline Points: 595 |
Post Options
Thanks(0)
Quote Reply
Posted: 11 January 2015 at 4:46pm |
|
Beautiful, you could see your reflection in those!
|
|
|
|
|
dj_yt
Bonus Stage
Joined: 24 February 2010 Location: Surrey, UK. Status: Offline Points: 439 |
Post Options
Thanks(0)
Quote Reply
Posted: 24 January 2015 at 5:08pm |
|
Thanks David!
I am still working hard on this... I am in P38/sand/Dolphin Glaze/sand mode. I also need free time in decent weather to sand outside (and I'm often looking after my daughter during the day). I've reached the limit of what I'm prepared to do inside now! I'll post some further pics when there's something more interesting to show. Also... if anyone has a spare coin door (mine is full of holes) let me know!
|
|
|
|
|
Post Reply
|
Page 123 7> |
 Tweet
Tweet
|
| Forum Jump | Forum Permissions You cannot post new topics in this forum You cannot reply to topics in this forum You cannot delete your posts in this forum You cannot edit your posts in this forum You cannot create polls in this forum You cannot vote in polls in this forum |


 Topic Options